




.svg)
.svg)

.svg)


.svg)




.svg)
.png?width=500&height=424&name=Style-1---V1-(1).png)

.png?width=1230&height=692&name=Vector%20(13).png)
What is Laptop Pre-Configuration and Why Does it Matter?
Laptop pre-configuration is the process of preparing a company device for secure and productive use before it reaches a new employee.
It includes
- Registering the device,
- Enrolling it in endpoint management,
- Applying operating-system and security policies,
- Assigning applications and access, and
- Linking the hardware to an employee asset record.
A well-prepared laptop should become usable after the employee connects to the internet and completes an approved sign-in flow. Some personal steps will remain, such as setting up MFA or signing in to a licensed app. However, the employee should not have to choose security settings, find installers, request basic access, or explain the device to IT.
This is especially important for remote hardware, which may spend its entire life outside the corporate network. Encryption, endpoint protection, patching, identity controls, and remote management must therefore be active or enforced during enrollment.
How to Pre-Configure Laptops for Remote Hires
Every pre-configured laptop that leaves your control travels to someone's home, often crosses a border, and then runs indefinitely on whatever home Wi-Fi the employee has.
In that setting, full-disk encryption and MDM enrollment carry weight. A poorly configured remote laptop increases risk if it is lost, stolen, or used outside policy. Encryption, MDM enrollment, and remote wipe determine how quickly IT can contain the issue.
Which of those two you get is decided at configuration time, not when the device goes missing.
Step 1: Define role-based hardware and software standards
Everything downstream gets easier once you stop managing each new hire as a fresh decision. The right laptop for a content designer is not the right laptop for a backend engineer, and pretending otherwise leads either to underpowered machines that frustrate your employees or to overspending on hardware that a marketer will never use to its fullest.
So before you configure anything, settle on two or three device tiers and map roles to them.
To make this easier, you can build standards around two variables: role and location.
Role determines performance, software, and peripherals. Location determines local stock, keyboard and power standards, warranty support, and whether the preferred model can be delivered without customs delays.
|
Device tier |
Typical roles |
Practical starting point |
Main buying criteria |
|
Standard |
HR, marketing, finance, customer success, operations |
16 GB memory, 512 GB storage, business-class processor |
Battery life, webcam, portability, warranty, repairability |
|
Power user |
Developers, analysts, designers, data and engineering teams |
32 GB or more memory, 1 TB storage, higher-performance processor; dedicated graphics where needed |
Sustained performance, display, ports, local workload requirements |
|
Mobile or executive |
Leadership and frequent travelers |
16 to 32 GB memory, 512 GB to 1 TB storage |
Low weight, durability, battery life, international warranty |
Three tiers cover the vast majority of organizations. Resist the urge to add a fourth and fifth, because every extra tier multiplies the configurations you have to maintain and the spares you have to stock.
Software deserves the same treatment. Define role-based application packages that deploy automatically during provisioning, so the machine arrives with the right tools. For instance, a designer gets Adobe Creative Cloud and Figma, while an engineer gets their IDEs, Docker, and the VPN client.
When these packages are mapped in advance, configuration won’t need per-device judgment calls, and it becomes a process that a junior team member or an automated workflow can run without supervision.
Finally, assign ownership. Your IT team should own technical and security standards, while procurement or finance should own approved vendors and price bands. Hiring managers should request documented exceptions.
Pro-tip: Set peripheral standards as well. Specify which roles receive monitors, docks, security keys, privacy filters, or ergonomic accessories, then apply a country overlay for keyboard layout, plug type, and availability. This gives procurement a repeatable order and makes end-to-end procurement easier to manage.
Step 2: Choose the appropriate MDM tool for your device fleet
Choosing an MDM isn't a hunt for the "best" platform. It's a few decisions about what your fleet actually needs. Get them wrong, and it shows up later as failed enrollments on someone's first morning.
One clarification first: Apple Business Manager and Windows Autopilot are often called MDM products, but neither manages devices. They register company-owned hardware and route it into enrollment. The MDM platform then applies the policies, apps, security settings, and compliance rules.
You need both pieces, so work through these questions:
- What OS mix are we managing? Apple-only, Windows-only, or mixed. Apple-first teams tend toward a specialist (Jamf, Mosyle, Iru); Windows-first teams already in Microsoft 365 usually reach for Intune. A mixed fleet doesn't automatically need two tools: Intune can often cover both when macOS needs are simple.
- Basic enrollment or deep endpoint control? Encryption and app deployment are a very different requirement from custom scripting, strict patch deadlines, and detailed compliance reporting. Paying for depth you'll never configure is as much a mistake as hitting a lightweight tool's ceiling six months in.
- Can our reseller register devices before they ship? This quietly decides whether zero-touch is even possible. Apple needs the device registered in ABM at purchase; Windows Autopilot needs its hardware hash uploaded to your tenant beforehand. If your buying channel can't do this, sort it out before you order hardware.
- Can the tool enforce your baseline? Confirm it can enforce encryption, app deployment, patching, compliance, remote wipe, and recovery key escrow. A tool that only recommends updates rather than enforcing them leaves gaps you can't close remotely.
Then, before committing, run a proof of concept on one real Mac and one Windows machine.
Confirm both complete zero-touch enrollment unattended and activate encryption with a recoverable key, accept an enforced patch, install apps, provision Wi-Fi/VPN profiles silently, and respond to a remote lock or wipe.
If any of these fail on one OS under a single-tool setup, split that platform out to a specialist rather than discovering the gap with a new hire.
For more detail, read Workwize's guide to zero-touch deployment.
Step 3: Build a security baseline before any device is shipped
A security baseline is the set of controls every device must have active before it leaves the warehouse, with limited documented exceptions for role, seniority, or location. The point of treating it as a baseline rather than a per-device checklist is consistency.
When the same hardened configuration ships on every machine, you can actually prove what is running in the field, which matters when an auditor or a regulator comes knocking.
A remote laptop cannot stop that threat volume, but unmanaged devices, weak authentication, missing patches, and unavailable recovery keys make ordinary incidents harder to contain.
Your baseline should include:
- Full-disk encryption: Enable BitLocker on Windows and FileVault on macOS, confirm encryption has completed, and escrow recovery keys to an approved system.
- Endpoint detection and response: Install the EDR agent and verify that it reports as healthy in the central console.
- Strong identity controls: Require MFA, preferably phishing-resistant methods where supported, and connect sensitive access to device compliance.
- Least privilege: Give users standard accounts and provide controlled elevation for approved administrative tasks.
- Patch management: Define OS and application update rings, deadlines, restart behavior, and documented exceptions.
- Network protection: Configure the host firewall and the approved VPN, zero-trust, or application-level access method.
- Recovery controls: Apply screen-lock rules and enable remote lock or wipe where appropriate.
There is a compliance payoff beyond the security itself. SOC 2, ISO 27001, GDPR, and HIPAA each require documented evidence that devices meet defined security standards.
A baseline that is version-controlled and applied identically across the fleet is the foundation of that evidence, because you can point to exactly what was configured, when, and on which machines. Ad hoc setup gives you no such record, which is why it fails audits even when the underlying security happens to be fine.
Step 4: Enroll in MDM and configure zero-touch provisioning
With your platform chosen, zero-touch enrollment becomes an operational workflow. The device ships from a reseller or regional warehouse, and IT controls what happens the moment it's first switched on. Here's the sequence:
|
Step |
Action |
|---|---|
|
1 |
Purchase the approved device through a vendor that can register it with Apple Business Manager or Windows Autopilot |
|
2 |
Confirm the device record, then assign the correct MDM service, deployment profile, user, and role group |
|
3 |
Ship it with the correct peripherals and a concise QuickStart guide |
|
4 |
Have the employee connect to the internet and complete the company identity flow |
|
5 |
Let enrollment apply security policies, certificates, applications, and configuration automatically |
|
6 |
Confirm the device reports healthy in the management console before the employee begins work |
Two registration prerequisites directly affect this workflow, so build your ordering around them.
Apple zero-touch depends on the device being registered in ABM at the point of purchase, which means buying through Apple or an authorized reseller with your Apple Customer Number on file so serial numbers flow into your account automatically.
Buy the same MacBook at retail on a personal card, and it never appears in ABM, which kills the zero-touch flow.
Windows Autopilot instead needs the device registered before deployment via its hardware hash, which a reseller can pre-load for new orders or you can capture yourself for hardware already in hand.
Zero-touch fails in predictable ways, and four cover most cases:
- The device was never registered in ABM or Autopilot before shipping.
- The employee is on a network that blocks the ports enrollment needs.
- The enrollment profile doesn't match the device's OS version.
- The enrollment profile isn't set to non-removable, which lets the employee strip the MDM profile and take the device out of your control.
A short QA pass before shipping, covered in Step 6, catches nearly all of these before they reach a new hire reading you an error code over video.
Step 5: Install and configure role-based applications
There are three ways to get software onto a fleet, and they sit on a clear maturity curve from painful to nearly effortless.
1. Manual installationAs the name suggests, IT or the employee installs each application by hand. It works for one laptop and falls apart at any scale because it is slow and produces inconsistent machines that are hard to support.
2. MDM-pushed applicationsHere, IT pushes an approved set of apps automatically through the MDM console and they install silently during enrollment, with no action required from the employee. This is the baseline every serious remote operation should already be at.
3. Self-service catalogThis is the most mature option, where employees can install additional pre-approved apps on demand without filing a ticket. A good catalog noticeably cuts the support burden while still keeping installations inside guardrails IT controls, which is the balance most teams are actually after.
Two details routinely get skipped and cause first-day pain.
- SSO configuration: Pre-configure each application with the company's single sign-on endpoint so the employee never has to know or manage individual app credentials.
- License management: Decide upfront which licenses are assigned at enrollment and which are reclaimed at offboarding, and track them from that first assignment. SaaS sprawl almost always begins at onboarding, when licenses get handed out manually and then forgotten, so building reclamation into the process from the start beats auditing your way out of the mess later.
For the wider context on how this fits into managing devices and software across their full life, check out our IT asset management guide.

Step 6: Run a pre-shipment QA check
QA at scale has two levels. One validates the configuration; the other validates the individual shipment. Keeping them separate prevents technicians from opening every box and manually completing a setup that was meant to be zero-touch.
Configuration QA
Test each enrollment profile and role package on a clean reference device whenever the OS, MDM policy, identity flow, or required app set changes.
Start from the out-of-box setup screen and confirm that enrollment completes without admin help. Then check the essentials: required apps install, encryption turns on, the recovery key is escrowed, SSO works, and the device reaches compliance.
Finally, record the OS version, profile version, tester, date, and result.
Per-device fulfillment QA
For each shipment, verify without signing in as the employee:
- The model, memory, storage, and peripherals match the order
- The serial number matches the purchase and asset records
- The device appears in Apple Business or Autopilot and has the correct tenant and profile
- The employee account, licenses, role group, start date, and delivery address are correct
- Policies and app assignments target the intended device or user
- The asset tag and condition records are complete where required
- The package includes a one-page QuickStart guide and support route that works before corporate email
- Tracking details are attached to the asset and employee records
A staging warehouse can also test the display, webcam, microphone, battery, ports, and charger. For sealed vendor-direct shipments, verify registration data and use physical spot checks on a defined sample rather than opening every device by default.
Pro-tip: Keep the QuickStart guide very short. One r/sysadmin discussion described a scalable flow in which the reseller registers and pre-provisions laptops, adds an asset tag and printed instructions, and ships directly to the employee.
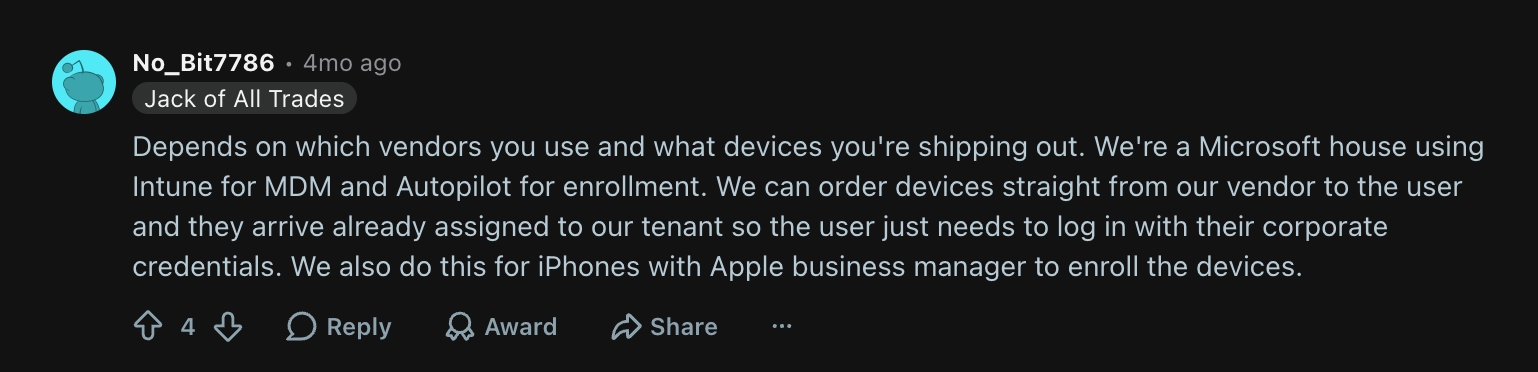
Via Reddit
Another practitioner noted that users are far more likely to follow one page with clear screenshots than a long manual.
Step 7: Ship with asset tracking built in from day one
Shipping starts the operational life of the laptop. The asset record should exist before the carrier scans the package, and it should follow the device through assignment, support, repair, storage, reassignment, retrieval, and disposal.
At a minimum, record:
- Asset ID and serial number
- Manufacturer, model, specification, and purchase date
- Purchase cost, warranty, supplier, and depreciation method where finance needs it
- Assigned employee, department, manager, country, and work location
- MDM and security status
- Shipment date, carrier, tracking number, delivery status, and proof of handoff where available
- Current lifecycle stage, such as ordered, in configuration, shipped, active, in repair, in storage, retrieval pending, or disposed
- Condition records and relevant certificates, including data-erasure or disposal evidence at end of life
Link the record to the employee in your HRIS or identity system, but keep the ITAM platform as the source of truth for the hardware. Employees change teams, addresses, and countries and even laptops get reassigned. The asset ID and serial number should stay fixed while each assignment becomes part of the device history.
This is also the right time to plan retrieval. Decide who triggers the return when HR records an exit, how the employee will send the device back, and which contact details can be used under your policy. The employee should know from day one that the laptop remains company property and how return logistics will work.
That record is relevant for compliance as well. For devices that handle sensitive data, frameworks like GDPR, HIPAA, and SOC 2 expect you to show who held the device, where it went, and what happened to the data on it. The asset record created at shipment becomes the foundation for that evidence, but only if it is complete and maintained consistently.
An ITAM platform like Workwize can simplify this process by connecting deployment data to the asset registry. The platform also tracks lifecycle status and can track depreciation and lifecycle cost per device. That closes a common gap between procurement and ITAM, where the laptop is successfully delivered but never becomes part of the central inventory.
For more on managing the years after day one, read Workwize’s guides to device lifecycle management tools and hardware asset management.

Pre-Configuration Checklist: Download or Use In-Article
The checklist below can be copied into a ticket template, spreadsheet, or workflow engine. Assign a named owner and a due date to every row. A checkbox without ownership is only a hope.
You can also download Workwize’s IT onboarding checklist.
|
Phase |
Task |
Suggested owner |
Status |
|
Before ordering |
Confirm employee name, role, manager, country, address, start date, and employment status. |
People Ops |
 |
|
Before ordering |
Select the approved device tier and local equivalent. |
IT |
|
|
Before ordering |
Select the role-based software and license package. |
IT / App owners |
|
|
Before ordering |
Confirm keyboard, power adapter, peripherals, warranty, and accessibility needs. |
IT / People Ops |
|
|
Before ordering |
Confirm that the vendor can register the device with Apple Business or Windows Autopilot. |
IT / Procurement |
|
|
Before ordering |
Confirm that MDM, identity, and endpoint-security licenses are available. |
IT |
|
|
Before shipping |
Verify the serial number and purchase details. |
Vendor / IT |
|
|
Before shipping |
Verify Apple Business or Autopilot registration and tenant assignment. |
Vendor / IT |
|
|
Before shipping |
Assign the correct enrollment profile, user group, and role package. |
IT |
|
|
Before shipping |
Apply encryption, EDR, firewall, patching, least-privilege, and access policies. |
IT / Security |
|
|
Before shipping |
Assign required applications and the approved self-service catalog. |
IT |
|
|
Before shipping |
Configure SSO, certificates, VPN or zero-trust access, and remote support. |
IT |
|
|
Before shipping |
Confirm the employee account, temporary access method, MFA path, and licenses. |
IT / Identity team |
|
|
Before shipping |
Run configuration QA on the current profile and OS version. |
IT |
|
|
Before shipping |
Confirm model, specification, keyboard, accessories, and visible condition. |
Vendor / Warehouse |
|
|
Before shipping |
Create the asset record and attach the serial number, asset ID, assigned user, cost, and warranty. |
ITAM / IT |
|
|
Before shipping |
Attach condition photos where required. |
Vendor / Warehouse |
|
|
Before shipping |
Include a one-page QuickStart guide and pre-login support contact. |
IT |
|
|
At shipment |
Record carrier, tracking number, ship date, and expected delivery date. |
Vendor / Logistics |
|
|
At shipment |
Link shipment details to the employee and asset records. |
ITAM / IT |
|
|
At shipment |
Record the return method and retrieval responsibility. |
IT / People Ops |
|
|
Day one |
Confirm delivery and successful enrollment. |
IT / Hiring manager |
|
|
Day one |
Verify encryption, EDR check-in, compliance, SSO, and required application access. |
IT |
|
|
Day one |
Resolve failed enrollment or replace the device through the documented escalation path. |
IT / Vendor |
|
|
After day one |
Close the onboarding task only after the asset record and device health are complete. |
IT |
|

How Workwize Automates Laptop Pre-Configuration for Distributed Teams
Manual pre-configuration can hold together when everyone is in one country and IT only has a few laptops to prepare each month. However, the process starts to strain when hiring becomes distributed.
In such instances, HR confirms the new hire, the procurement team places the order, IT manages MDM, a reseller handles stock, a warehouse packs the device, and a carrier gets it to the employee. Naturally, one missed handoff is enough to turn day one into a nightmare.
Workwize is built for that messy middle layer between hiring a person and getting a secure, working laptop into their hands. It connects with the systems companies already use, including HRIS, identity, MDM, and IT service management tools, with 82 native integrations, so onboarding can move as one workflow instead of a chain of separate requests.
HRIS-triggered procurement
When a new hire is added to the HR system, Workwize can trigger the device workflow automatically. The employee’s role and location determine what they can order or receive, which reduces the back-and-forth between HR, IT, and procurement.
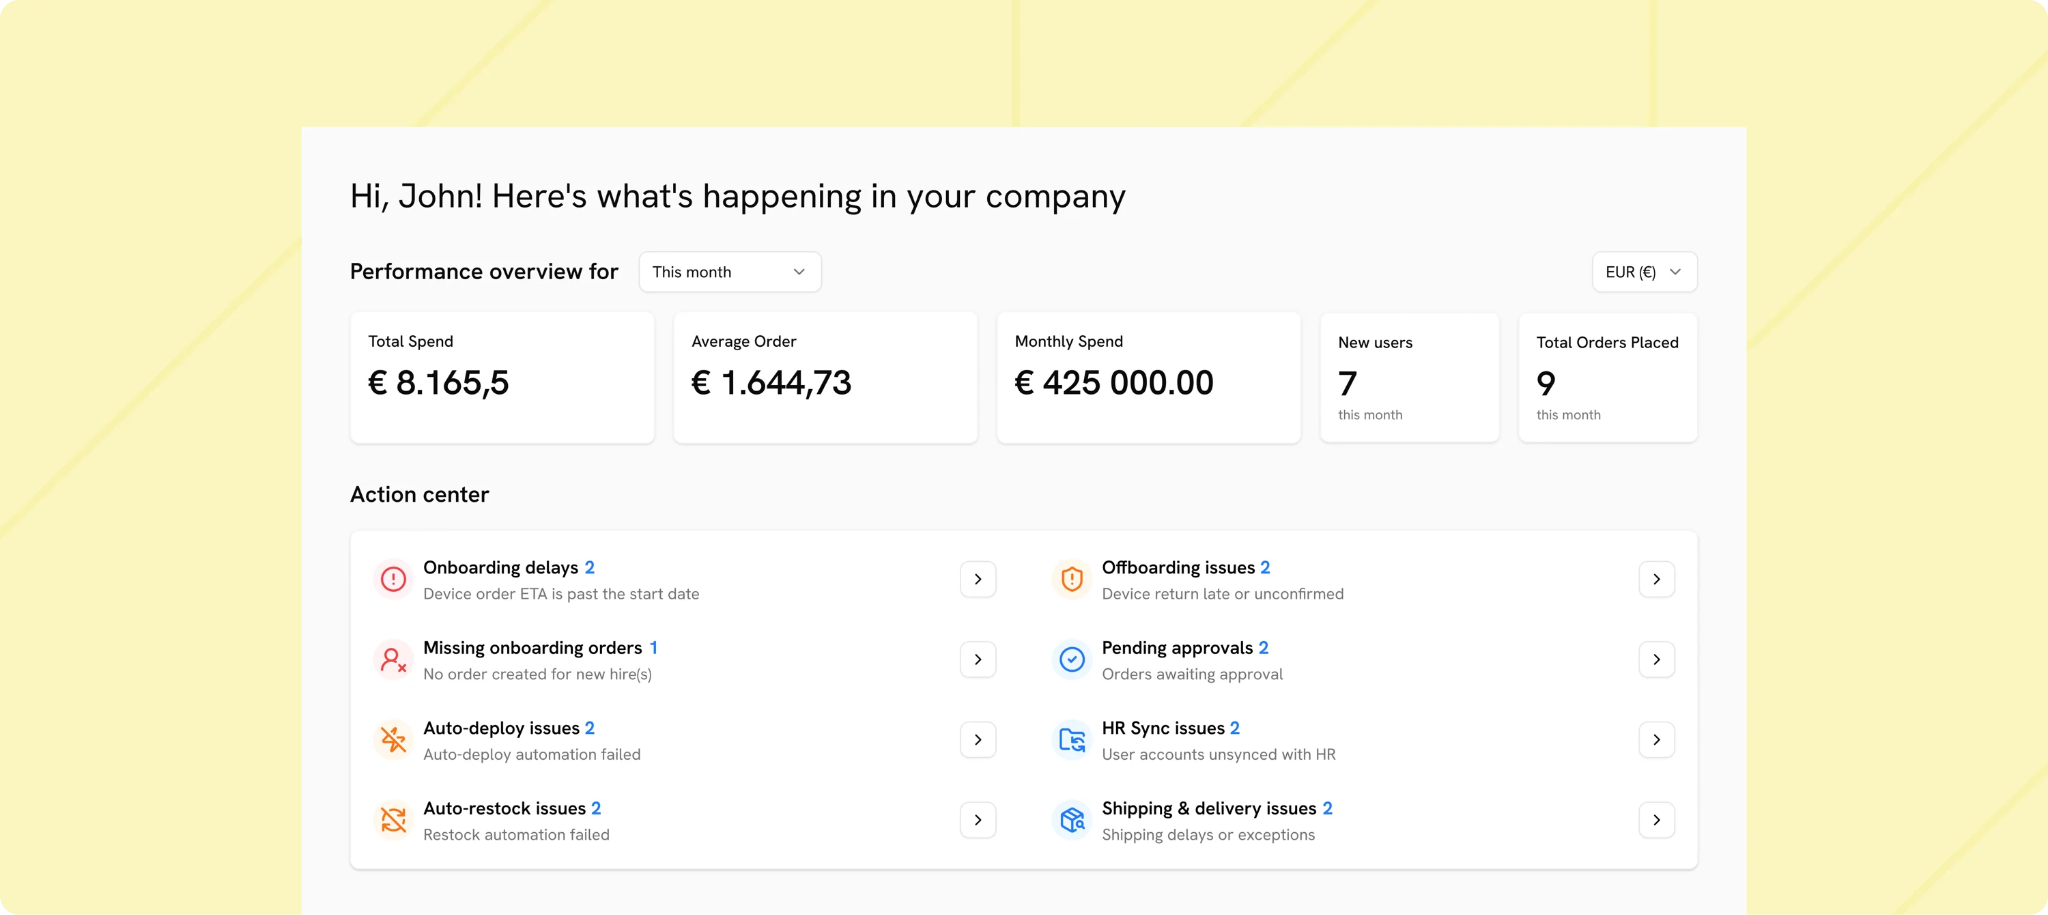
Instead of someone manually checking the hire’s country, role, start date, and equipment tier, the workflow can route them to the right catalog from the start.
MDM-connected pre-provisioning
Workwize integrates with tools such as Apple Business, Windows Autopilot, Jamf, and Intune so devices can be registered and prepared against the company’s existing policies before they ship.
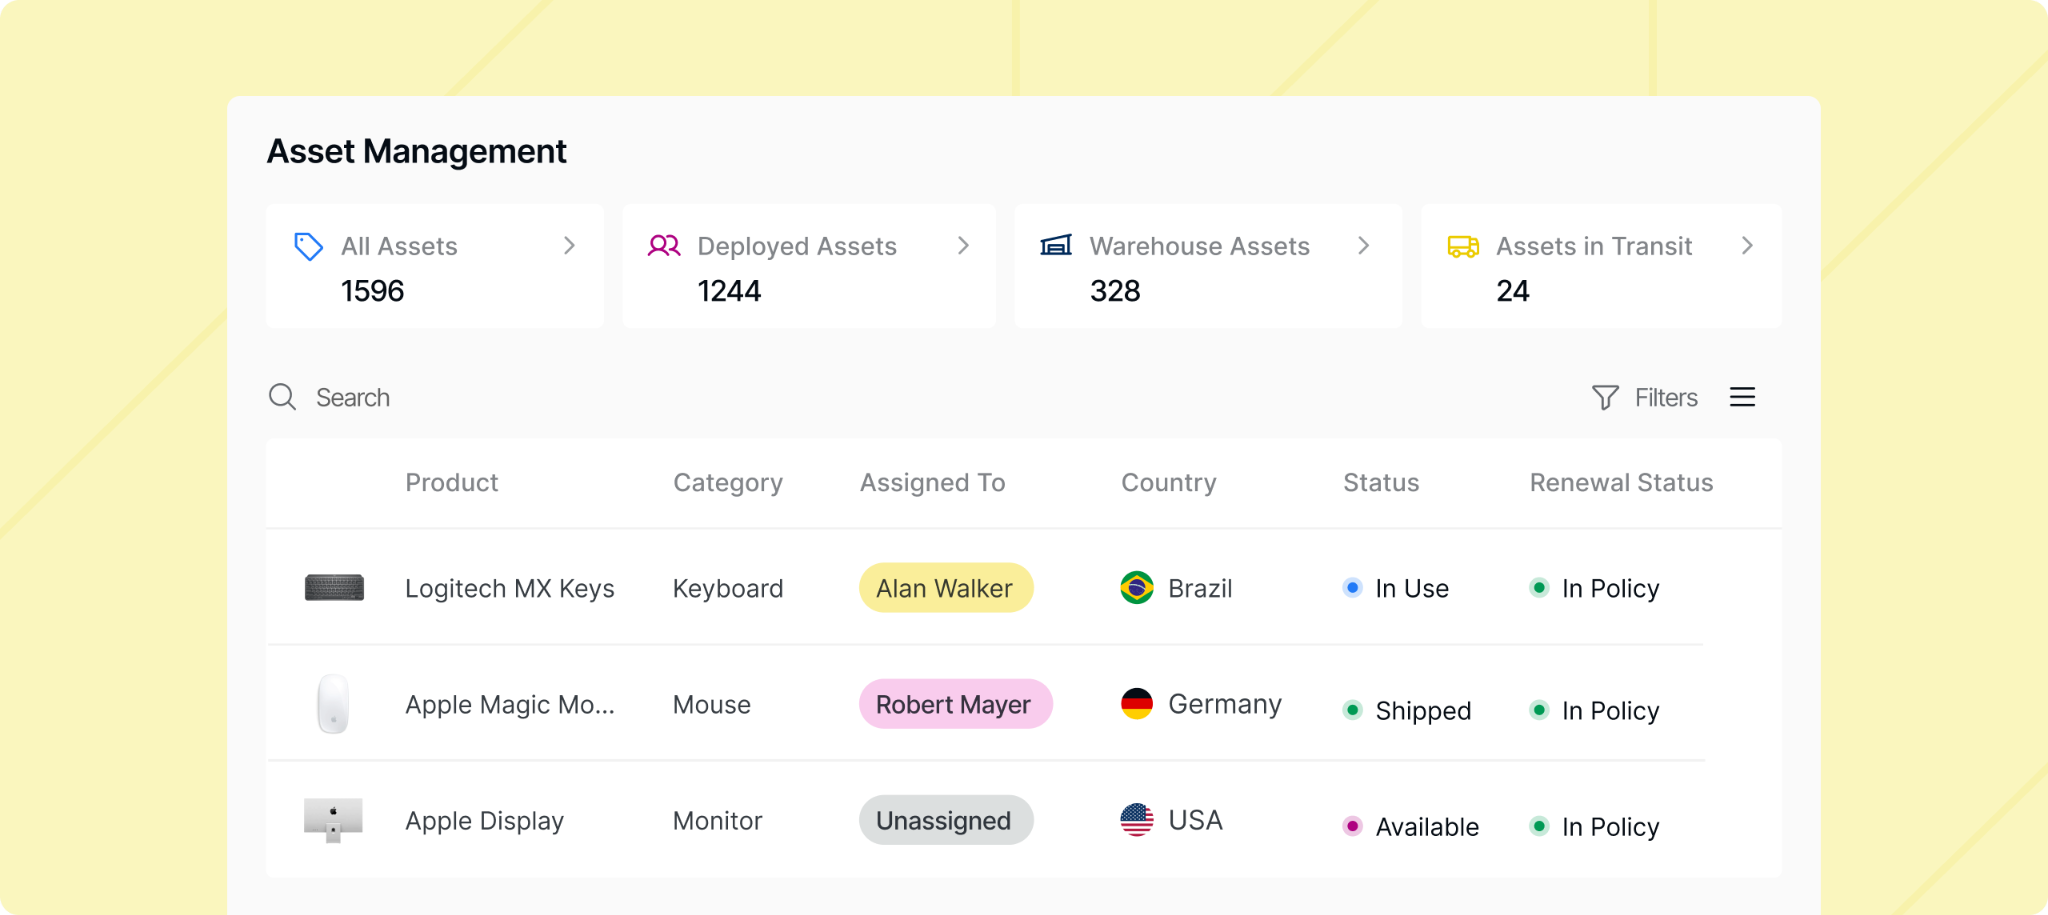
The MDM still controls security, applications, and compliance. Workwize helps make sure the correct device reaches the correct employee with that process already in motion, rather than leaving IT to fix enrollment issues on the employee’s first morning.
Local Sourcing and Global Delivery
The logistics piece matters just as much as the technical setup. Workwize currently offers local sourcing and delivery coverage across 120 countries, and most devices ship from local warehouses in five to seven days.
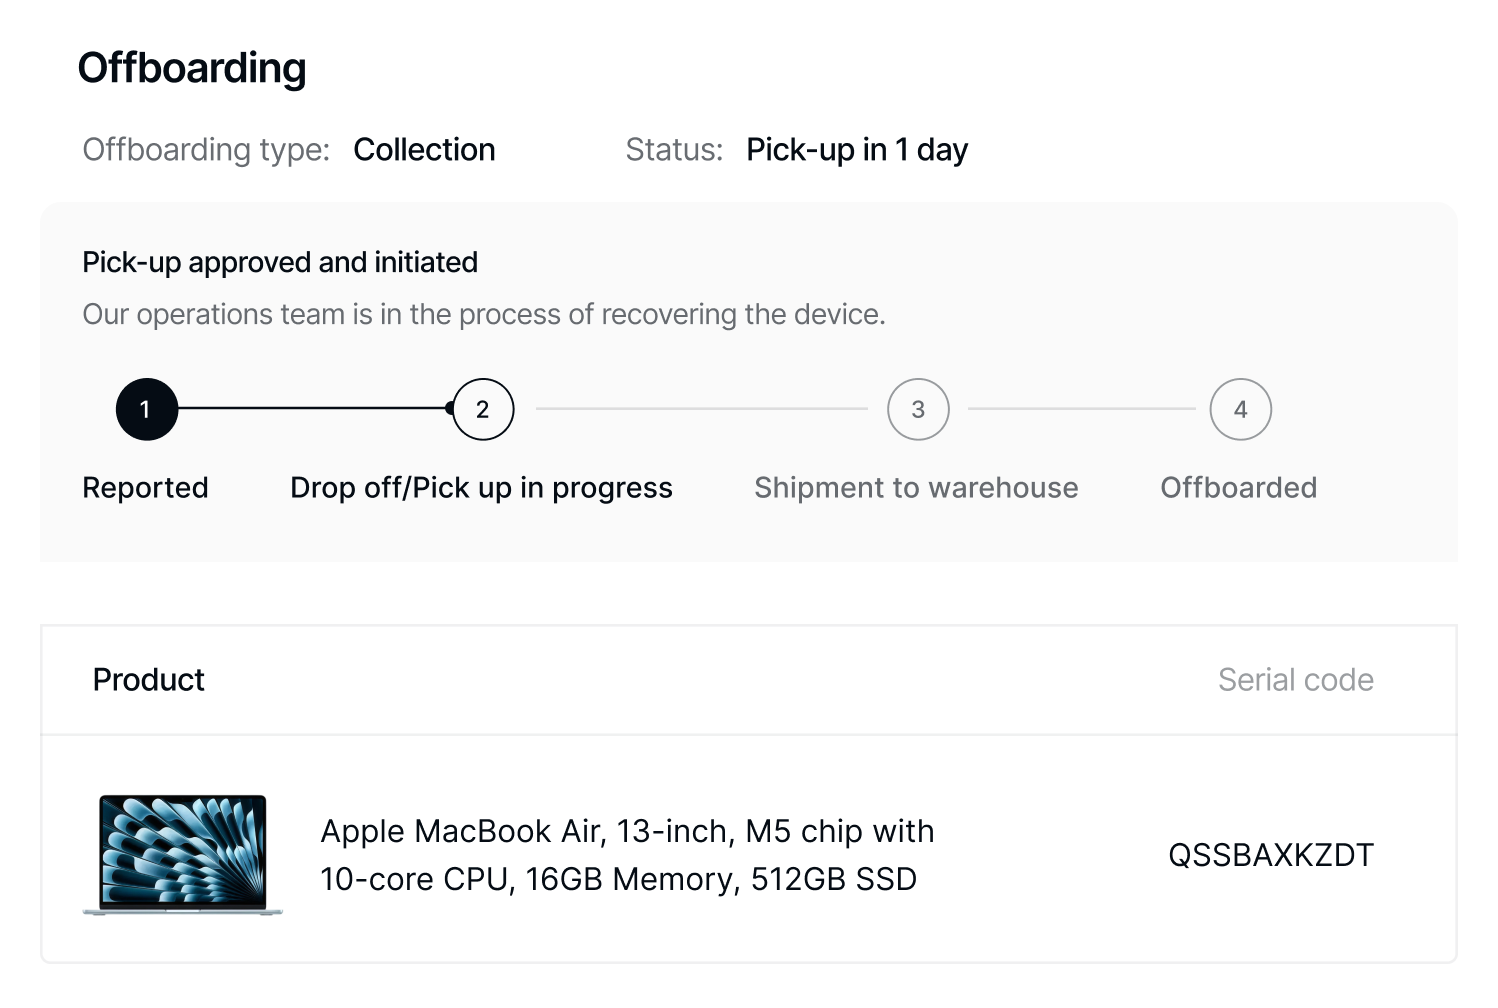
That can help distributed teams avoid the usual customs delays and cross-border shipping problems, although actual delivery time will still depend on local stock, configuration needs, destination, and carrier conditions.
Automatic asset registration
Once the device is deployed, it is not treated as a finished order and forgotten. Workwize adds it to the asset registry and tracks it through later stages such as repair, retrieval, storage, and disposal.
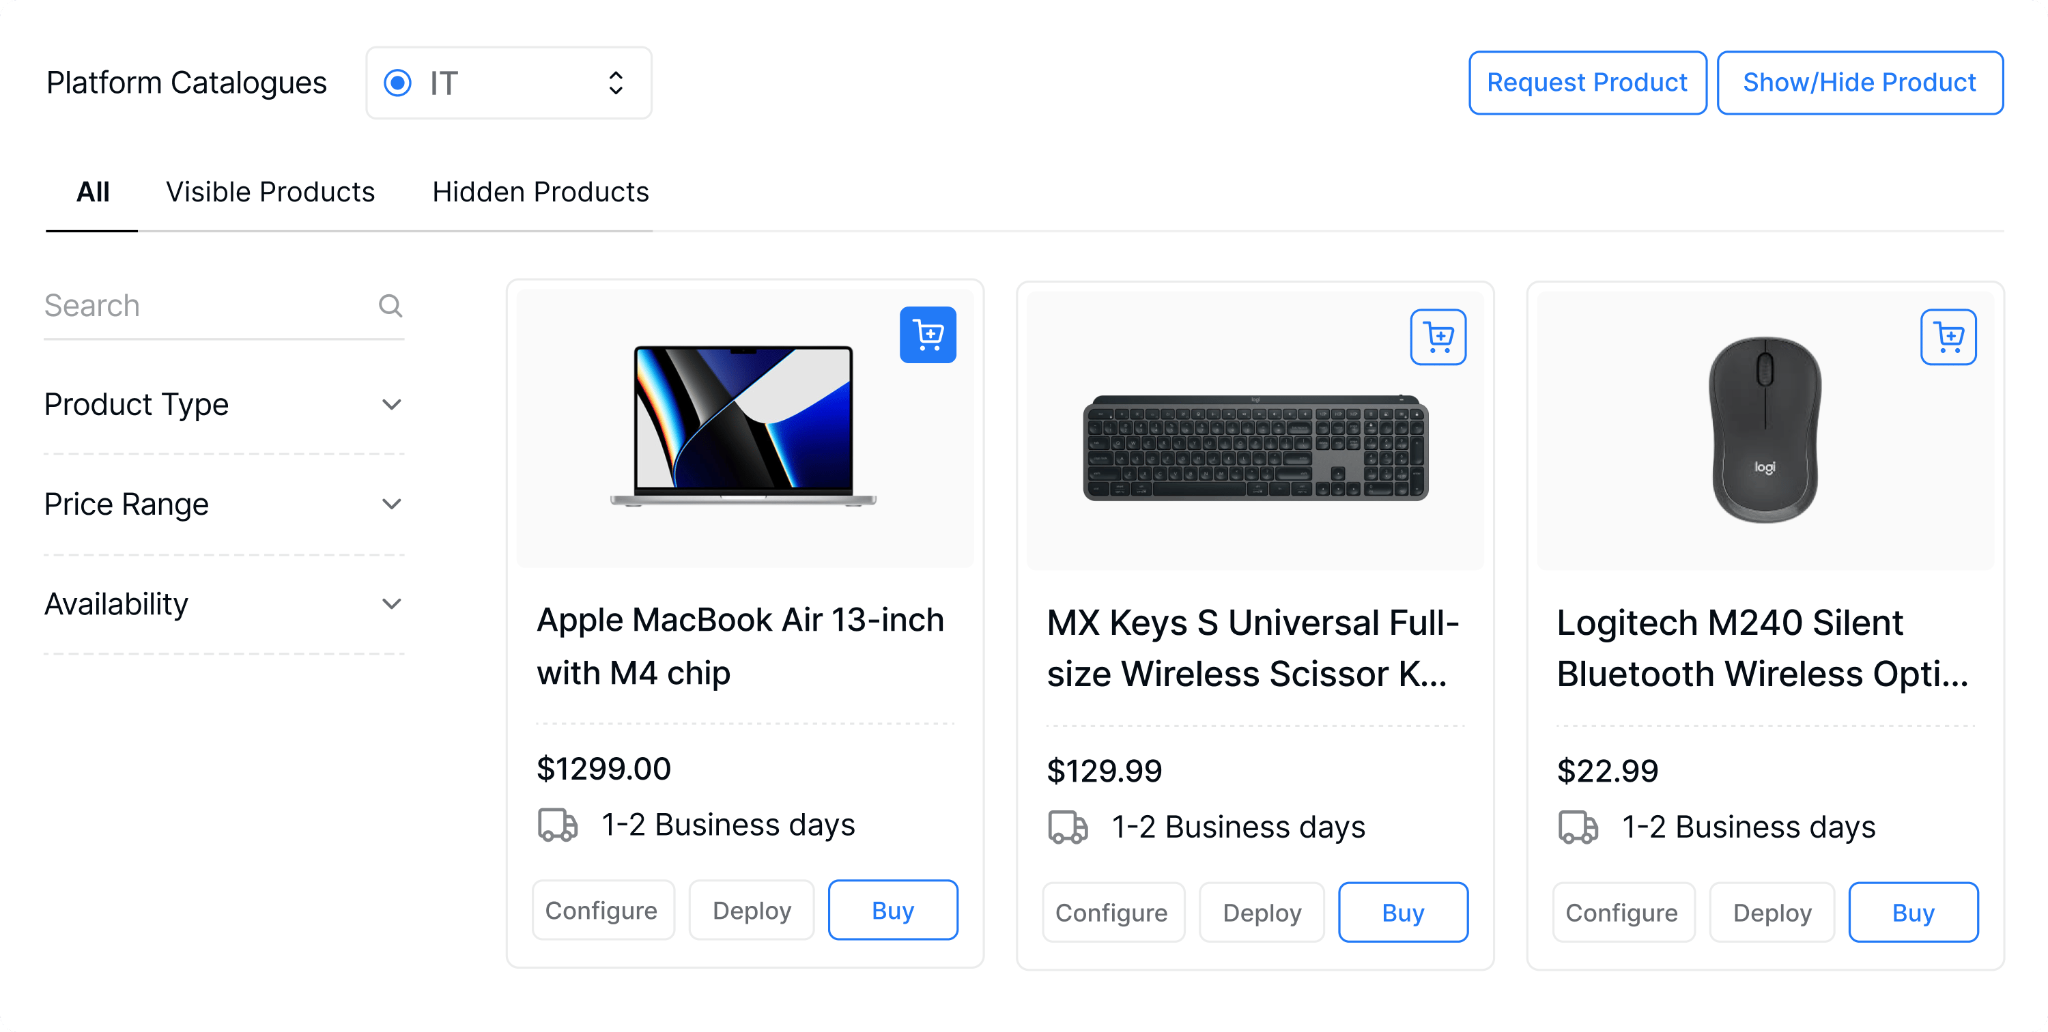
Workwize can also track depreciation and lifecycle cost, which helps IT and finance work from the same hardware record instead of reconciling spreadsheets later.
Lifecycle Visibility Beyond Day One
Workwize is not an MDM replacement, but it is the operational layer around it. For teams that have outgrown spreadsheets, reseller emails, and laptops passing through an IT employee's home for setup, it brings procurement, provisioning, delivery, inventory, and retrieval into one flow.
For teams that have outgrown spreadsheets, reseller emails, and laptops passing through an IT employee’s home for setup, it brings procurement, provisioning, delivery, inventory, and retrieval into one flow.
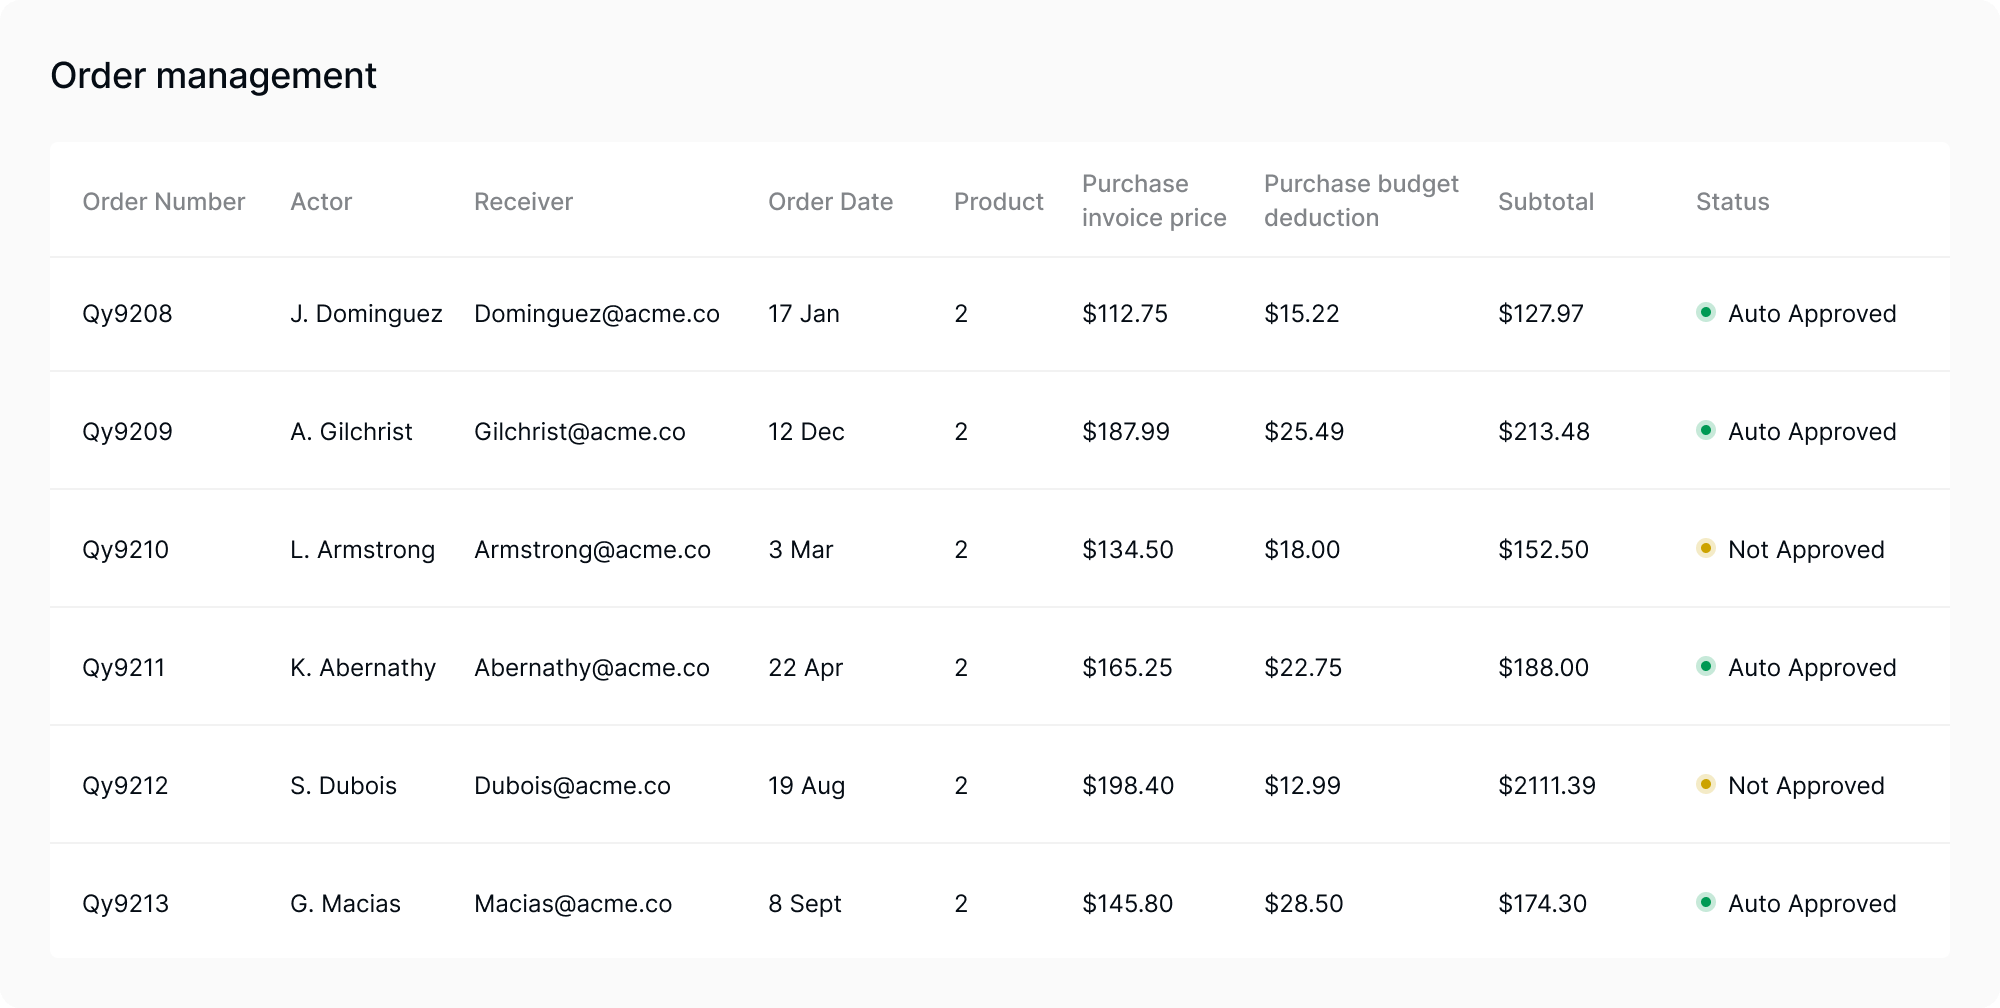
Gartner expects more than half of organizations to adopt autonomous endpoint-management capabilities by 2029 to reduce manual effort. Workwize applies the same idea to the physical lifecycle that surrounds endpoint management.
Schedule a Workwize demo now and see how it can optimize your device pre-configuration workflow.


Establish a single source of truth for every IT asset across the globe.
.png?width=258&height=318&name=g10%20(5).png)
More related resources to help you stop firefighting hardware operations.

Get monthly insights into how other IT leaders are improving their ops.



.png?width=2880&height=1232&name=Group%202147262874%20(1).png)
Stop coordinating
hardware like it's 2012.
.svg)
.png?width=172&height=68&name=apple%20business%20patner%20(1).png)
.svg)
.svg)
.svg)
.svg)